Watercoloring wigs has become an increasingly popular trend, allowing individuals to experiment with vibrant and unique hair colors without the commitment. While most wigs are readily available in a variety of shades, watercoloring offers the opportunity to customize and create a truly one-of-a-kind look. In this comprehensive guide, we will explore the process of watercoloring a 613 wig, providing step-by-step instructions, tips, and techniques to help you achieve stunning results.
Preparing the Wig for Watercoloring.
Before you begin the watercoloring process, it’s essential to prepare the wig adequately. Here are some steps to follow:
Detangle the Wig: Gently comb through the wig using a wide-toothed comb or wig brush to remove any knots or tangles. Start from the ends and work your way up to avoid damaging the hair strands.
Wash the Wig: Depending on the wig’s condition, it might be necessary to wash it before watercoloring. Use a mild shampoo and lukewarm water to cleanse the wig, ensuring that any product buildup or dirt is removed. Rinse thoroughly and allow the wig to air dry completely.
Style the Wig: Once the wig is dry, you can style it as desired. You may choose to straighten, curl, or add any specific texture to the wig before applying watercolors.
By properly preparing your 613 wig, you create a clean and suitable canvas for the watercoloring process, ensuring optimal results.
Gathering the Necessary Supplies.
Gathering the necessary supplies is crucial for a successful watercoloring session on your 613 wig. Here are the essential items you’ll need:
1. Watercolor Medium:
Watercolor Paints: Choose high-quality watercolor paints in various shades. Opt for watercolor pigments that are safe to use on synthetic hair or human hair wigs.
Watercolor Pencils: These pencils are useful for adding fine details and precise coloring.
Watercolor Markers: Markers offer convenience and ease of use, particularly for larger areas.
2. Brushes:
Flat Brushes: These brushes are ideal for covering larger areas of the wig with watercolor.
Round Brushes: Round brushes are versatile and suitable for creating detailed work, including adding highlights and intricate designs.
Fine Liner Brush: A fine liner brush is handy for precise lines and delicate details.
3. Palette:
Watercolor Palette: Choose a palette with wells or compartments to hold and mix your watercolor paints. A plastic or porcelain palette is recommended for easy cleaning.
4. Water:
Clean Water Container: Use a container or cup to hold clean water for diluting and rinsing your brushes.
5. Wig Stand or Mannequin Head:
Wig Stand or Mannequin Head: A stable and secure wig stand or mannequin head is essential for holding the wig in place while watercoloring. This allows you to work on the wig more comfortably and prevents any accidental smudging.
6. Protective Covering:
Plastic or Disposable Tablecloth: Cover your work surface with a plastic or disposable tablecloth to protect it from any accidental spills or splatters.
7. Hair Clips or Hair Ties:
Hair Clips or Hair Ties: Use these to section off the wig for easier application and access to different areas.
8. Towels or Paper Towels:
Towels or Paper Towels: Keep towels or paper towels handy for blotting excess water and paint from the wig and brushes.
9. Spray Bottle:
Spray Bottle: Fill a spray bottle with clean water to mist the wig and keep it damp during the watercoloring process. This helps the colors blend more easily.
10. Protective Gloves (Optional):
Protective Gloves: If you prefer to protect your hands from any staining or to have better control over the coloring process, consider using disposable gloves.
Preparing the Wig.
Preparing the wig before watercoloring is essential to ensure optimal results. Follow these steps to properly prepare your 613 wig:
1. Detangle the Wig:
Before starting the watercoloring process, gently detangle the wig using a wide-toothed comb or wig brush. Start from the ends of the hair strands and work your way up to the roots. Be gentle to avoid damaging or pulling out any hair strands.
2. Wash the Wig:
Depending on the condition of the wig and any product buildup, it may be necessary to wash it before watercoloring. Fill a basin or sink with lukewarm water and add a mild shampoo specifically designed for wigs or gentle hair cleanser. Gently swirl the wig in the water, ensuring that the shampoo reaches all the hair strands. Avoid rubbing or scrubbing the wig vigorously, as this can cause tangling or damage.
3. Rinse Thoroughly:
After washing, rinse the wig thoroughly with clean water to remove any residual shampoo or cleanser. Make sure the water runs clear, indicating that all the shampoo has been washed out.
4. Condition the Wig:
Apply a small amount of wig conditioner or a leave-in conditioner specifically formulated for wigs. Use your fingers or a wide-toothed comb to distribute the conditioner evenly throughout the hair strands. Leave the conditioner in for a few minutes to moisturize and soften the hair.
5. Rinse and Air Dry:
Rinse the wig again with clean water to remove the conditioner. Gently squeeze out any excess water from the wig, avoiding any wringing or twisting motions that can cause damage. Place the wig on a clean towel or wig stand to air dry naturally. Avoid using a hairdryer or applying heat, as this can damage the wig fibers.
6. Style the Wig:
Once the wig is completely dry, you can style it as desired before watercoloring. Use a wig brush or comb to create the desired parting, style, or texture. Ensure that the wig is smooth and free from tangles.
7. Protect the Wig Cap (Optional):
If you wish to protect the wig cap from the watercoloring process, you can cover it with a plastic bag or wrap it with cling film. This step is particularly useful if you want to preserve the original wig color at the roots.
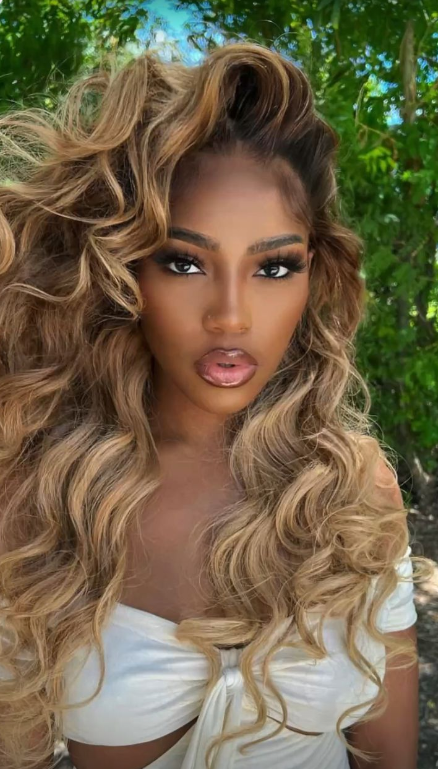 https://new.mscocohair.com/wp-content/uploads/2023/07/image-19-171x300.png 171w" alt="" width="438" height="769" />
Applying the Watercolor.
Applying watercolor to your 613 wig requires a thoughtful approach and careful technique. Here is a step-by-step guide to help you apply watercolor effectively:
1. Creating a Color Palette:
Before you begin, decide on the color palette you want to use for your watercoloring. Prepare your watercolor paints, pencils, or markers in the desired shades. You can mix colors on a palette to achieve unique hues and variations.
2. Choosing the Right Technique:
There are various techniques you can use to apply watercolor to your wig. Some common techniques include wet-on-wet, dry brush, glazing, and layering. Experiment with different techniques to achieve the desired effects.
3. Wet-on-Wet Technique:
Wet the wig hair strands using a spray bottle filled with clean water. This will help the watercolors blend more easily. Dip your brush into the desired color and apply it to the wet hair strands. The wet surface will allow the color to spread and create soft, blended effects. Continue adding colors and blending until you achieve the desired look.
4. Dry Brush Technique:
With the dry brush technique, the wig hair strands remain dry while applying the watercolors. Load your brush with a small amount of color and remove excess moisture by dabbing it on a paper towel. Lightly brush the color onto the wig hair, focusing on specific areas or creating textured effects. This technique works well for adding highlights, details, or creating a subtle wash of color.
5. Glazing Technique:
The glazing technique involves layering transparent washes of color over the wig hair strands to create depth and dimension. Start with a light wash of color and let it dry completely. Then, apply additional layers of color gradually, allowing each layer to dry before adding the next. This technique allows you to build up intensity and create a translucent, multi-dimensional effect.
6. Layering Colors:
Layering colors can add complexity and depth to your watercoloring. Start with a base color and let it dry. Then, apply additional colors on top to create highlights, shadows, or blended effects. Experiment with different layering techniques to achieve the desired color combinations and textures.
7. Work in Sections:
To maintain control and avoid colors bleeding into unwanted areas, work on the wig in sections. Clip or tie up portions of the wig that you’re not currently watercoloring. This ensures that the colors stay where you want them and allows for easier application.
8. Blend and Feather:
Use a clean, damp brush to blend colors together or create soft transitions between different shades. Feathering the colors with a light touch can create a natural and seamless appearance.
9. Take Breaks and Evaluate:
Throughout the watercoloring process, take breaks to step back and evaluate the overall look. This will help you make adjustments, add more colors, or refine the application as needed.
Enhancing and Protecting the Watercolor.
Enhancing and protecting the watercolor on your 613 wig is an important step to ensure longevity and maintain the desired look. Here are some techniques and tips to enhance and protect your watercolor:
1. Adding Highlights and Shadows:
To enhance the watercolor on your wig, consider adding highlights and shadows. You can use a lighter or darker shade of the same color or even a contrasting color to create dimension. Apply the highlights and shadows strategically to mimic natural hair highlights and lowlights.
2. Sealing and Fixing the Watercolor:
To protect the watercolor and prevent it from fading or smudging, you can apply a sealant or fixative. Choose a wig-safe sealant or hairspray with a light hold. Lightly mist the wig with the sealant, ensuring you cover the colored areas. This will help set the watercolor and make it more resistant to rubbing or fading.
3. Wig Care Tips and Maintenance:
Proper wig care is crucial to maintain the watercolor and ensure the longevity of your 613 wig. Here are some tips for wig care:
Avoid excessive heat: Heat can cause the watercolor to fade or bleed. Avoid using heated styling tools on the wig or exposing it to high temperatures.
Gentle handling: Handle the wig with care to avoid rubbing or smudging the watercolor. Be cautious when combing or styling to prevent any damage to the color.
Avoid excessive washing: Over-washing can cause the watercolor to fade or wash out. Only wash the wig when necessary and use a gentle shampoo formulated for wigs.
Storage: When not in use, store the wig in a clean, dry place away from direct sunlight. Avoid folding or compressing the wig to maintain the watercolor’s integrity.
4. Touch-Ups and Maintenance:
Over time, the watercolor on your wig may require touch-ups or maintenance. If you notice any areas where the color has faded or needs refinement, you can carefully reapply the watercolor using the same techniques. Take care to match the existing colors and blend them seamlessly.
5. Avoid Contact with Water:
While watercoloring a wig allows for temporary customization, it’s important to avoid contact with water as much as possible to prevent the colors from bleeding or washing out. Protect the wig from rain, excessive sweating, or water-related activities.
Removing the Watercolor.
If you wish to remove the watercolor from your 613 wig and revert it back to its original color, follow these steps:
1. Assess the Condition:
Before proceeding with the removal process, assess the condition of the wig and the watercolor. If the watercolor has started to fade naturally or if it has been on the wig for an extended period, it may have already lightened significantly. In such cases, removing the watercolor may not be necessary.
2. Gather Supplies:
You will need the following supplies to remove the watercolor from your wig:
Mild shampoo or wig cleanser
Lukewarm water
Towels or paper towels
Wide-toothed comb or wig brush
Wig conditioner (optional)
Wig stand or mannequin head
3. Prepare the Work Area:
Set up your workspace by laying down a plastic or disposable tablecloth to protect the surface from any potential mess during the removal process.
4. Detangle the Wig:
Gently detangle the wig using a wide-toothed comb or wig brush to remove any knots or tangles. Start from the ends and work your way up to the roots. Be cautious not to pull or damage the hair strands.
5. Wash the Wig:
Fill a basin or sink with lukewarm water and add a mild shampoo or wig cleanser. Submerge the wig in the water and gently swirl it around to help loosen the watercolor. Allow the wig to soak for a few minutes, then rinse it thoroughly with clean water until the water runs clear.
6. Condition the Wig (optional):
After rinsing out the shampoo, you can apply a small amount of wig conditioner to the wig if desired. Distribute the conditioner evenly throughout the hair strands using your fingers or a wide-toothed comb. Leave it in for a few minutes, then rinse it out thoroughly.
7. Dry the Wig:
Gently squeeze out any excess water from the wig without wringing or twisting it. Place the wig on a clean towel or wig stand to air dry naturally. Avoid using a hairdryer or applying heat, as this can damage the wig fibers.
8. Comb and Style:
Once the wig is completely dry, comb through it again with a wide-toothed comb or wig brush to ensure it is tangle-free. Style the wig as desired or leave it in its natural state.
Troubleshooting Common Issues.
Watercoloring a wig can sometimes come with its own set of challenges. Here are some common issues that may arise during the process and troubleshooting tips to help you overcome them:
1. Color Fading or Bleeding:
If you notice that the watercolor on your 613 wig is fading or bleeding, it may be due to various factors such as low-quality watercolor, excessive washing, or exposure to water. To troubleshoot this issue:
Use high-quality watercolor paints specifically designed for wigs to ensure better color retention.
Limit the wig’s exposure to water and avoid excessive washing.
Apply a sealant or fixative to help set the watercolor and reduce color bleeding.
2. Uneven Color Distribution:
Uneven color distribution can occur if the watercolor is not applied evenly or if the wig hair strands are not thoroughly saturated. To troubleshoot this issue:
Ensure that the wig hair strands are wet or damp before applying the watercolor to promote even color absorption.
Apply the watercolor in thin layers, gradually building up the color to achieve a more uniform distribution.
Blend the colors with a clean, damp brush to create smooth transitions and even color blending.
3. Streaks or Smudges:
Streaks or smudges may appear if the watercolor is applied too heavily or if the wig is not handled carefully during the drying process. To troubleshoot this issue:
Apply the watercolor in thin layers, allowing each layer to dry before adding more color.
Use a light touch when applying the watercolor to avoid saturating the wig hair strands excessively.
Handle the wig gently during the drying process to prevent accidental smudging or transferring of the watercolor.
4. Patchy or Mottled Appearance:
A patchy or mottled appearance can occur if the watercolor is not blended properly or if the colors are not harmoniously layered. To troubleshoot this issue:
Blend the colors together using a clean, damp brush to create smooth transitions and avoid sharp color demarcations.
Layer the colors strategically, starting with lighter shades and gradually building up to darker or more intense colors.
Take breaks during the watercoloring process to step back and evaluate the overall look, making adjustments as needed.
Inspiration and Creative Ideas.
When it comes to watercoloring a 613 wig, the possibilities for creativity and self-expression are endless. Here are some inspiration and creative ideas to help you explore different looks and unleash your artistic vision:
1. Ombre and Gradient Effects:
Create a stunning ombre or gradient effect by blending two or more colors seamlessly from root to tip. Experiment with different color combinations, such as pastel pink fading into lavender, or vibrant blue transitioning into turquoise. The smooth transition of colors adds depth and dimension to your wig.
2. Pastel and Vibrant Colors:
Embrace your bold and vibrant side by using vivid, eye-catching colors. Consider shades like vibrant red, electric blue, or neon green to make a statement. Alternatively, you can opt for soft pastel tones, such as baby pink, mint green, or lilac, for a more subtle and dreamy look.
3. Hair Accessories and Embellishments:
Enhance your watercolored wig by incorporating hair accessories and embellishments. Add flowers, ribbons, feathers, or decorative hairpins to elevate the overall look. This allows you to create a unique and personalized style that complements the watercoloring.
4. Natural-Inspired Colors:
Take inspiration from nature and its beautiful hues. Earthy tones like warm browns, soft oranges, and deep greens can create a natural and organic look. Consider adding subtle highlights or lowlights to mimic the natural variation found in real hair.
5. Fantasy and Cosmic Themes:
Let your imagination run wild with fantasy or cosmic-themed watercoloring. Create a galaxy-inspired wig with deep blues, purples, and shimmering metallic shades. Alternatively, experiment with a mermaid-inspired look using aquatic colors like teal, seafoam green, and silver.
6. Patterns and Designs:
Go beyond simple color application and explore patterns and designs on your wig. Use watercolor pencils or markers to draw intricate patterns, floral motifs, or geometric shapes. This adds a unique and artistic touch to your watercoloring.
7. Experiment with Different Techniques:
Don’t be afraid to experiment with different watercoloring techniques. Try techniques like splattering, stippling, or creating textured effects to add visual interest and complexity to your wig. Mixing techniques can result in truly mesmerizing and dynamic looks.
8. Inspired by Art Movements:
Take inspiration from various art movements like Impressionism, Pop Art, or Abstract Expressionism. Incorporate the color palettes and techniques associated with these movements to create a wig that resembles a work of art.
Summary up.
Watercoloring a 613 wig allows you to explore your creativity and experiment with different hair colors. By following this comprehensive guide, you will have the necessary knowledge and skills to watercolor your wig effectively. Remember to be patient, practice, and have fun with the process. With time, you will master the art of watercoloring and create stunning looks that showcase your unique style. Happy watercoloring!